Installing aaPanel on oracle cloud virtual machine

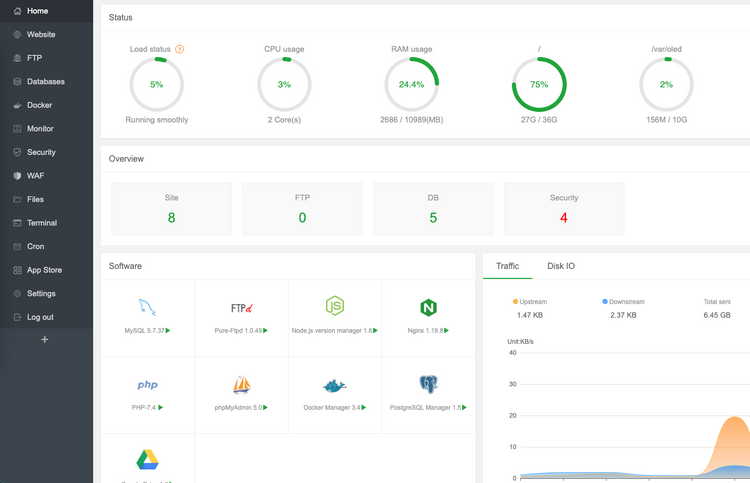
aaPanel is a free and open-source hosting control panel that can be installed on popular Linux distributions like Ubuntu, CentOS, Debian, etc. In this post, I would like to tell you step by step to installation instructions.
You can use any cloud provider for this but I am using the oracle cloud free tier. They have very attractive free cloud resources that you probably don't know. In summary, you can get
- 2 AMD-based VMs with 1 GB ram each
- Arm-based Ampere A1 cores and 24 GB of memory usable as 1 VM or up to 4 VMs with 3,000 OCPU hours and 18,000 GB hours per month
- 2 Block Volumes Storage, 200 GB total
- And many more. Check out their offerings.
Pre-requisites
- An oracle cloud free tier account
- knowledge of some basic Linux commands
Step 1: Creating the VM
In this step, we will create a new AMD-based VM, with CentOS 7 image. You can use other images (Ubuntu, Oracle Linux, CentOS 8, etc.) also. But there is a benefit to using CentOS 7. Later, when you install server software (Nginx, MySQL, etc.), aaPanel will give you 2 options - Fast and Compile. Fast will use pre-compiled binaries that are very fast to install but compile options are very stable because it will download sources, and compile them according to your server environment.
Let's create the VM.
- Log In to your oracle cloud console
- Go to your compute instance page and click create instance button.
- Chose a name of the instance, e.g. aapanel-centos-7
- Edit the Image and Shape > click Change image > Select CentOS, OS version to 7 > click Select image
- Under Add SSH keys, you can generate key pairs (default option) if you haven't already done so. Download the private and public keys and keep them in a separate folder. This will be needed later to log in to the server. If you already have those keys, select upload public key and chose .pub file.
- Finally, click create button. This will start the process and a few minutes later, your instance will be ready to install aaPanel.
Step 2: Installing aaPanel
In this step, we will log in to our newly created VM, update the server software, and install aaPanel. For this, we need some info - server_public_ip, username, and the private key that you used during the creation of the VM. You will find this information on the instance page under the instance access heading.
- Open your terminal or command prompt and navigate to the folder where you kept the SSH keys
- Log in to the VM using the following command. Replace username, server_public_ip, and your_private.key with your own info.
ssh username@server_public_ip -i your_private.key- Switch to the root user
sudo su -- Update the server
yum update- Install the aaPanel by entering the following code
yum install -y wget && wget -O install.sh http://www.aapanel.com/script/install_6.0_en.sh && bash install.sh aapanelinstallation prompts
The installation will prompt you for some info and confirmations. Here are my response
- installation directory /www - y
- panel SSL - N (will configure it later)
If everything goes well, the installation process will end in around 8 minutes. After installation is finished, you will find some login credentials and ports information. Save this info, you need it for accessing the panel.
Step 3: Open ports in the firewall
You will find some port information from the previous step. You need to open these ports in the cloud provider's firewall. In our case, default security list. To find this page, search the keyword security list in the search box on the console. Alternatively, you can go there from the instance detail page > virtual cloud network > security lists under resources.
In the security list page, you must Add Ingress Rules for all the ports according to the following table
| source type | source CIDR | IP protocol | Destination port range | Description |
|---|---|---|---|---|
| CIDR | 0.0.0.0/0 | TCP | port | aapanel |
Step 4: Installing software modules
Now log in to the newly installed aapanel using the credentials. Immediately after login, you will be prompted to install the necessary stack (LNMP/LAMP). Choose your stack. For example, I will go for Nginx, MySQL 8, PHP 8, and phpMyAdmin 5. And never forget to check for the FAST option to install from binary.
Step 5: Installing SSL and panel domain
In this step, you need a domain name, to install SSL in your panel. You can use a subdomain also. I prefer to add a subdomain rather than a domain as a panel URL.
- Add an A record to your domain DNS pointing to the server's Public IP. If you are using Cloudflare, be sure to uncheck the proxy.
- In the aaPanel, go to Settings. Enter the selected domain in the domain text field under the security tab. When you click save, the panel will set the domain and you can no longer access it with the IP address. So, you may see a blank page. Replace the IP with your domain in the browser's address bar and log in again.
- Now let's install SSL. Go to the settings, and click the Panel SSL switch under the security section. A dialog window will appear. Select the let's encrypt option, enter your email, check the terms, and submit. After a few moments, your panel will reload with the HTTPS protocol.
In certain cases, you may get some errors. If you can't log in to the panel, try removing the SSL options. Log in to the server via SSH, and enter the following command.
rm -f /www/server/panel/data/ssl.pl && /etc/init.d/bt restartOther panel ssh commands can be found here.
Congratulations!
If you have come so far, I now have a clean copy of aaPanel installed with the necessary software and SSL.
Video demo
For full features and review, click here for my other post.


Member discussion