Install ghost on oracle cloud
Ghost is a powerful, open-source blogging and content publishing platform. In this post, I will guide you to install ghost on oracle cloud and configure the domain, SSL, and backup strategy on Google Drive.
According to the official documentation, you can install ghost on different cloud providers like Digitalocean and Linode very easily with one click. But you have to pay monthly for that and there is some hassle regarding backups and restores. I have chosen Oracle Cloud because they have a very attractive free tier.
Now, there are 2 ways of installing ghost on a Linux server. By using ghost CLI and using docker. In this post, I will go for the docker image option.
I will also use aaPanel hosting panel for this. This is also free and comes with great features. I have reviewed this panel before and published a comprehensive guide on how to install it on oracle cloud.
Pre-requisites
- Oracle VM with aaPanel installed. Click here for the aaPanel installation guide.
- Some docker knowledge
- Domain name for the blog added to Cloudflare, and Origin server certificate
- Mailgun account for sending transitional emails
- Google account for backup
Step 1: Install the docker
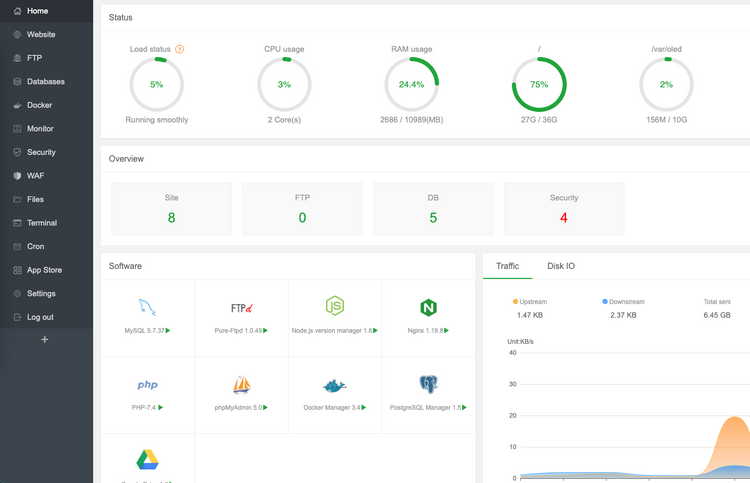
If you followed the aaPanel installation guide, you now have a fresh copy of aaPanel with Nginx, MySQL, PHP, and phpMyAdmin installed. Now it's time to install docker. Follow the steps below.
- log in to the panel
- go to the App stores of the panel
- search for docker
- install Docker manager.
Step 2: Domain DNS record setup
Since domain DNS will take some time to propagate, we will start with the domain. I recommend using Cloudflare as they have free features with free origin server certificates.
- Log in to the Cloudflare dashboard
- Add your domain to Cloudflare if you have not done yet
- Add an A record to the server's public IP address. If you are planning to use the root domain, use @ in the name. I will be using a subdomain.
- Be sure to check the proxy status is On.
- Go to the SSL/TLS section of your domain, and click origin server. Now create a cretificate for your domain. After generating, save the Private key and Certificate in a file. We will need these to install SSL and reverse proxy later.
Step 3: Set up MySQL database
Come back to the aaPanel. In this step, we will create a database for ghost. Please write down the database info, we need it later. Follow the steps.
- Navigate to the database and click Add Database
- Write the DB Name: ghost_data, username: ghost_data, and write down all the database info.
- Click Submit
This will create a database. Don't forget to change the DB name, username, and password according to your choice.
Step 4: Pull the ghost docker image
In this step, we will pull the ghost latest image from the docker hub. To do so:
- In the aaPanel, go to the Docker page and navigate to the Image tab
- Click the Pull Image button
- Enter the image name ghost:latest and click submit
This will pull the latest ghost image and save it to the server.
Step 5: Compose the template
In this step, we will write a docker-compose template with all the configuration options of ghost and persistent storage with docker volume.
- On aaPanel, go to the Compose template tab on the docker page and click Add Button
- Write the template name: ghost and remark: ghost template and paste the following code into the content.
version: '3.3'

services:

  ghost:
    image: ghost:latest
    restart: always
    ports:
      - 2368:2368
    environment:
      # see https://ghost.org/docs/config/#configuration-options
      database__client: mysql
      database__connection__host: server_public_ip
      database__connection__user: database_user
      database__connection__password: database_pass
      database__connection__database: database_name

      #url change your domain
      url: https://yourdomain.com

      #mail
      mail__transport: SMTP
      mail__options__host: smtp_host
      mail__options__secure: false
      mail__options__port: 587
      mail__options__service: SES
      mail__options__auth__user: smtp_user
      mail__options__auth__pass: smtp_pass

      #NODE_ENV: development
    volumes:
      - /www/ghost_blog:/var/lib/ghost/content
Do not forget to change the server_public_ip, database_user, database_pass, and database_name with the info you saved while creating the database. Change your domain and mail-sending info from Mailgun or other providers.
Step 6: Run the container from the template
In this step, we will create and run a container from the template. Follow the steps-
- In aaPanel, go to the compose tab and click Add compose project
- In the dialog, select ghost as a template, enter ghost for name and click submit. You can see a project named ghost started with 1 container with it.
- A minute later, go to the container tab. you might see container status is stopped. Let's examine the container log. Click the log link, on the right side of the container. You might see a database connection error. This is because database permission is set to local (when we created it) or there may be some port issue. Let's delete this project for now and fix all these issues in the next step. For this, click the delete link next to the log link.
Step 7: Open the port on the security group on oracle
On line 9, of the docker-compose file, we exposed the 2368 port on the host. So we need to open this port. Follow this instruction. Make sure MySQL port 3306 is there.
Next, come back to aaPanel to release ports from inside the server. Go to the security page, and open the 3306 and 2368 ports in the Firewall section. For example, type 3306 in the port, MySQL in the description, and click open. Do a similar thing for ghost port.
Next, go to the database page and modify the permission from the local server to the Specified IP and enter the server's public IP. Save the changes.
Next, perform step 6 again. In the log, you now see no error, and ghost is running fine.
Step 8: Reverse proxy with Nginx
In this step, we will set up a reverse Nginx proxy. It will proxy all the requests from our blog domain to http://localhost:2368. To configure SSL, we need a Cloudflare origin server certificate from step 2.
- Go to the website page on aaPanael, and click add site under PHP project.
- Enter the domain, FTP - no, Database - No, PHP version - static, and click submit. Refresh the page, you can see a new site is created.
- Click the site name. The site config dialog will open.
- Go to SSL > Other certificate, paste the Private key and Certificate and Save.
- Turn On the Force HTTPS option.
- Go to the Reverse proxy section and add a proxy.
- Enter the proxy name: ghost, target URL: http://localhost:2368, and submit.
Test your domain in the browser and you should see your new ghost blog website. Now you have successfully configured a reverse proxy for the ghost docker container. The next step is optional but very important.
Step 9: Configure backup
In this section, we will configure a backup for our newly created ghost blog with cron. In aaPanel, there are several plugins for that - Google Drive, S3, and remote FTP. Feel free to use whatever you like. But I would go for Google Drive.
First, you have to install the plugin in aaPanel. Go to App Store, search for google drive and install the plugin. After installation, click the settings. Complete the Google Drive verification process according to the instruction.
Now we will create 2 cron tasks for the backup - one for the database and the other for the ghost directory (/www/ghost_blog) in our server.
Database Backup
Go to the Cron page of aaPanel and add a task according to the instruction:
- Type of Task: Backup Database
- Execution cycle: choose how you want to backup
- Backup database: select the ghost_data or all
- Backup to: Google Drive
- save the task
Directory Backup
Go to the Cron page of aaPanel and add a task according to the instruction:
- Type of Task: Backup Directory
- Execution cycle: choose how you want to backup
- Directory to backup: select /www/ghost_blog/
- Backup to: Google Drive
- save the task
The tasks will now be available in the task list. To test a task, click execute link and wait for some time. You will see your backup is now uploaded to Google Drive.
Step 10: Update Ghost
Updating a ghost is really easy. follow the steps.
- Remove the existing container in aaPanel (docker > container > delete).
- Remove the existing ghost image (docker > image > delete).
- Create a new container again using the template.
This should download the latest image from the docker hub and create a new container using the template.
Note: If you want to upgrade to a specific version, adjust your ghost version in the template from ghost:latest to ghost:5.25.5 for example. Then follow the above steps.
You can see the available version in the docker hub.
Congratulations! You now successfully installed a ghost blog on oracle cloud and configured the SSL, reverse proxy, and backup strategy to Google Drive. Now go to your ghost admin panel by visiting yourdomain.com/ghost/
Video Guide
cheers 👋


Member discussion